Introduction
Pick and Pose is a web app for posing 3d characters allowing artists to create custom poses and using them as references for their art. It runs in the browser and is rendered on the client machine.
Camera controls
Use left mouse button to rotate around the scene.
Use right mouse button to pan the view.
Scoll the mouse wheel to zoom in and out.
Working with characters
Adding a character
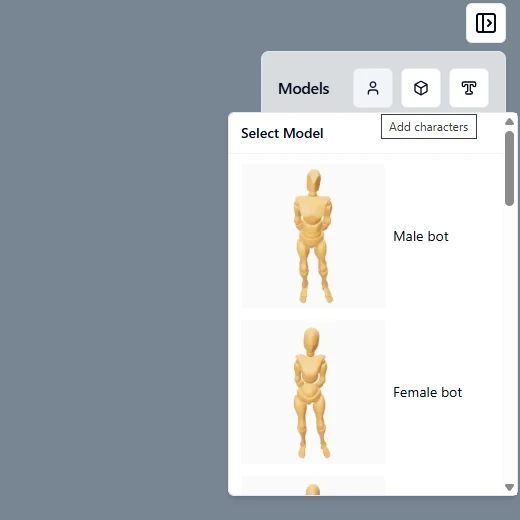
To create a character, click the 'Add Characters' button in the Models panel at the top right. From the dropdown menu, select the desired character to add it to the scene.
Selecting and posing joints
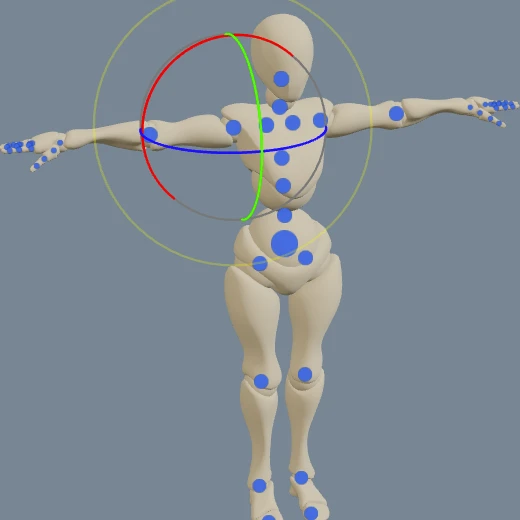
To pose the character, click on one of the blue markers located on the character's joints. Rotating a marker will rotate the corresponding body part. You can resize the control gizmo by pressing the '+' or '–' keys on your keyboard.
Switching between characters
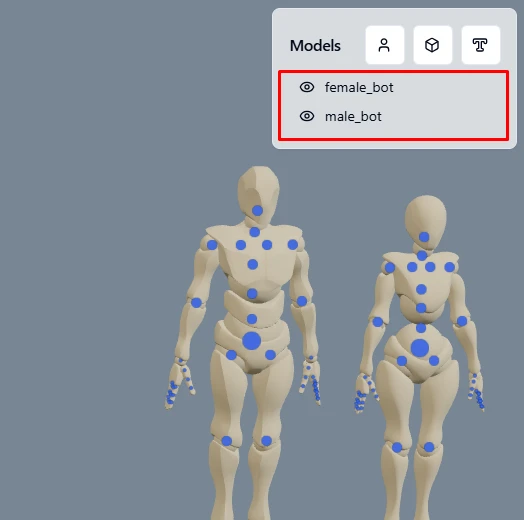
If you have multiple characters in the scene, you can switch between them using the Models panel. The selected model is highlighted with a gray background. You can also hide models by clicking on the eye icon next to it.
Character properties
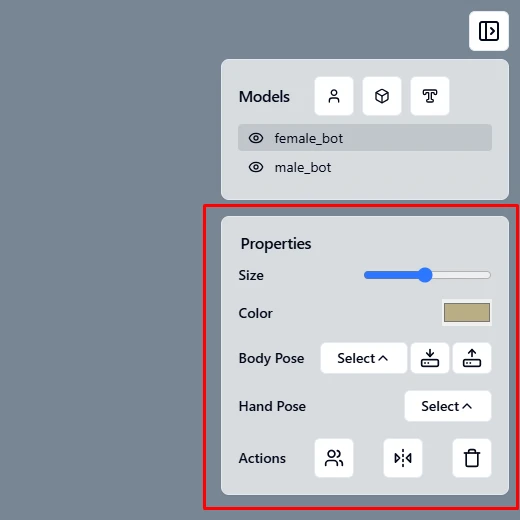
Once you select a character, you can edit its properties. You can adjust the size and color, choose from various body poses, and save custom poses to load later if needed. Character size can only be changed from Properties dialog. In the 'Actions' section, you can mirror current pose, duplicate the character, or delete it.
Adding & manipulating objects
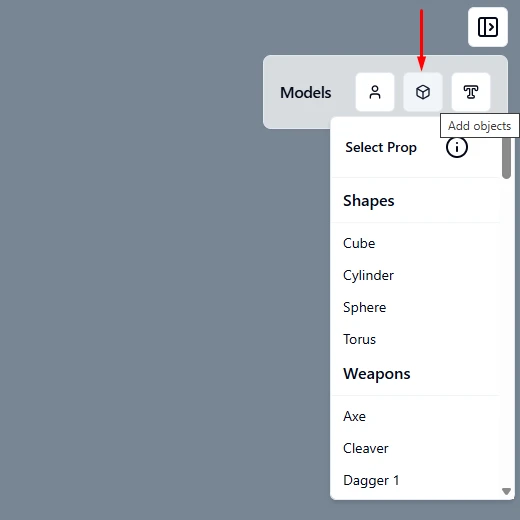
Adding items (props, hair meshes, accessories)
To add various items to the scene, click on the 'Add Objects' button in the Models panel and click on the desired model.
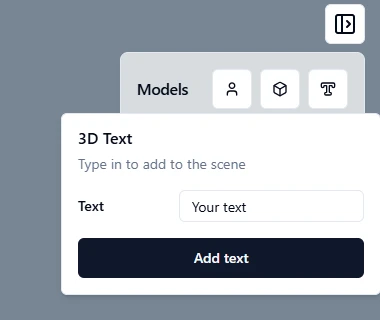
Using 3D text
To add 3D text, click the 'T' icon in the Models panel. Enter your text, then click the 'Add Text' button to apply it. Currently, text cannot be edited so you would need to create a new one if needed.
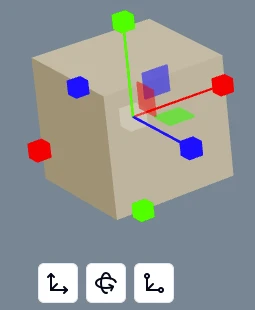
Move, scale, rotate
Items and 3D text can be moved, rotated, and scaled using the on-screen gizmo controls. Once you select an item, choose the desired action from the lower-left corner. You can resize the control gizmo by pressing the '+' or '–' keys on your keyboard.
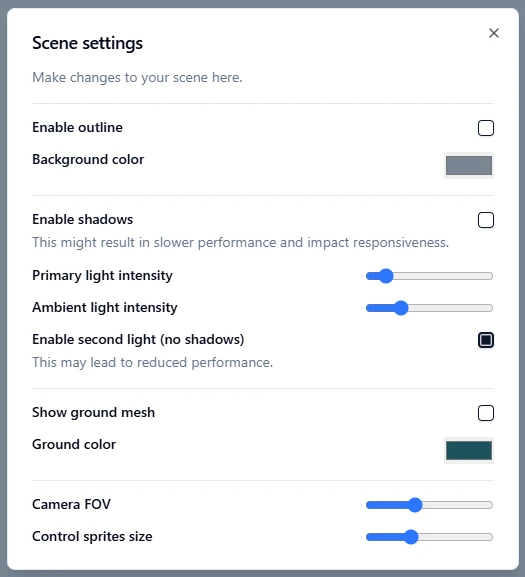
Scene settings
In this dialog, you can enable outlines around meshes in the scene, change the background color, enable shadows, adjust light intensity, and toggle the secondary light on or off. You can also show or hide the ground mesh and change its color. Adjusting the 'Control Sprites Size' setting changes the size of the control markers on joints, which is especially useful when resizing a character.
Saving and exporting
Saving and loading scenes
To save or load a scene, click the Menu icon in the top-left corner (the icon with three lines). Then choose 'Import Scene' or 'Export Scene.'
A dialog will appear, allowing you to select a save location and name for your scene file or a file you wish to load if loading scene you saved previously. Scenes are saved as JSON files with instructions on what models should be loaded and their properties.
Export images
Once you're satisfied with your scene, you can export it as a PNG image. You also have the option to export the image with a drawing-style filter applied.
Keyboard shortcuts
Once you have a model selected, you can switch between different control modes using your keyboard:
- Press 'w' to switch to Move mode.
- Press 'e' to switch to Rotate mode.
- Press 'q' to automatically zoom in on the selected model.
- To resize the control gizmo, press '+' to increase its size or '-' to decrease it.